Bruce and Karen George are delighted with the campervan they converted, using a flatpack kit. Jill Malcolm asked Bruce about the process.
Have you had any RV experience before?
Yes, but not in a campervan or motorhome. In England, we owned two caravans, and we brought our new Elddis caravan with us when we moved to New Zealand in 2007. We eventually sold the Elddis and bought a boat, because living in Auckland seemed like a sensible thing to do. However, when we moved to Wellington for work we had to sell that as well, because we wouldn’t have been able to continue the maintenance.
What led you to convert the van you now have?
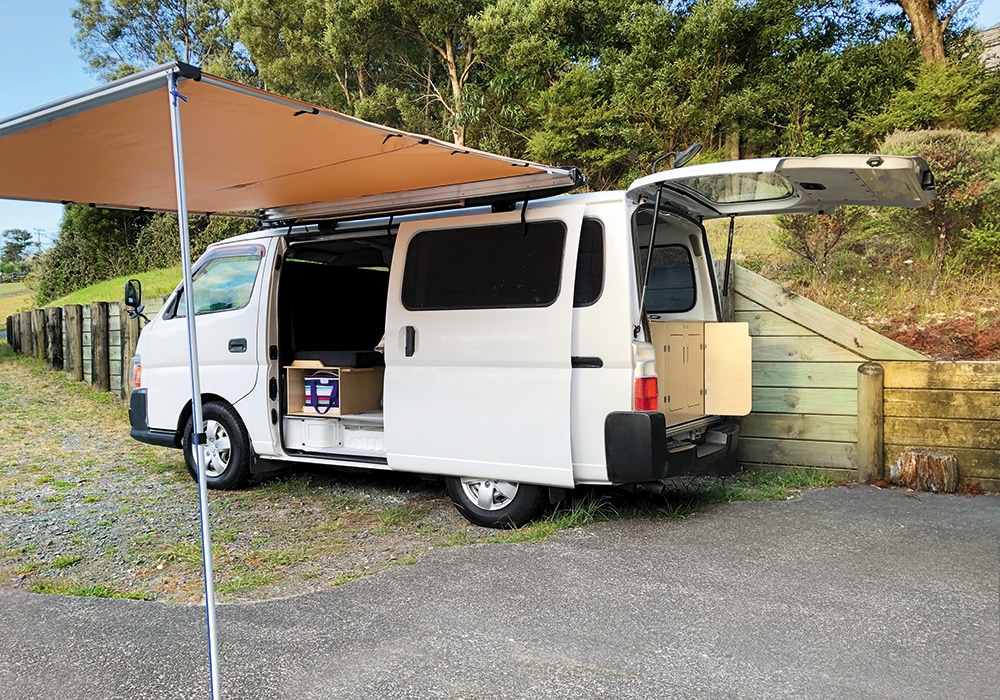
We came back to live in Auckland and like everybody else, we couldn’t go anywhere during the first lockdown. Our daughter’s partner had parked his work van on our driveway and bought himself a shiny new ute. His old model, a Nissan Caravan low-roof – dirty, full of old tools and sawdust, and covered with branding logos – just sat there. It came to us that if we bought it and cleaned it up the vehicle could, with a proper conversion, make a good short-stay campervan. I had trained as an aeronautical engineer, so I knew one end of a screwdriver from the other. I had often taken on small building projects as a hobby. As it turned out, I needed few of the skills I had.
What did you do next?
I started researching how one goes about a conversion and what it entails. This included a budget that factored in my time, the component costs, what the resale value might be and the quality I could expect.
I did all this on the net by trolling through websites and watching online videos of other people’s conversions. And that’s how I came across an outfit called VanLab, which had developed a flatpack system in 20 different styles to fit most of the models New Zealanders use.
Andy Jones and Robert Brumm, who are both aeronautical design engineers, have conceived, designed and built campervan kitsets using the latest technology in 3D scanning and computer-aided design (CAD) and manufacture (CAM). They can supply everything from the basic woodwork to plumbing, tanks, battery systems, lighting, toilets, curtains and squabs, so that each client can custom order. The company happened to be in Auckland, and the website gave me enough information. After one phone call I placed an order for a kitset that provided nearly everything.
How difficult was it to install the furniture and cabinetry?
It wasn’t difficult at all. The hardest part was cleaning up the interior before I started, as it was a real mess. I picked up the pack from VanLab on a Friday and by Sunday I had nearly all the woodwork built in. It was very straightforward. If I do another one, I would be even quicker.
The components are well explained, with comprehensive diagrams, and all the parts fit together like a jigsaw. Everything was in the pack – the New Zealand plywood panels, hinges, screws, door magnets and hatches, even the screwdriver. The panels are made so that they can only fit together one way. As a result, I couldn’t get any part in the wrong place. Even the screws were marked as to which one went where, and whether they had to face up or down. The plumbing was just as simple to assemble. It all fitted together easily. I love having projects, and the whole process of putting this together was enjoyable. I would do it all again in a flash and I probably will, but next time there may be an advantage in buying a taller, longer van.
The company will supply curtains, but I made my own as I have an upholstery machine. I added roof racks for our surfboards and a 3×3 metre awning with LED lights that power up from a cigarette-lighter socket just inside the side door. We also have a portable step to make access a bit easier.
Did you encounter any problems?
I struggled with the electrics, mainly because I did them after I had done the woodwork.
After building the cabinets, getting the right wires into the battery box presented a challenge. Eventually I did it, but I needed help. It was easy to phone or video-call Andy or Robert, who were supportive and very patient. They talked me through the process and in the end, everything came together and it all works. Next time I would do the electrics at the same time as the cabinetry, rather than afterwards. That would be a lot easier.

How has it worked out overall?
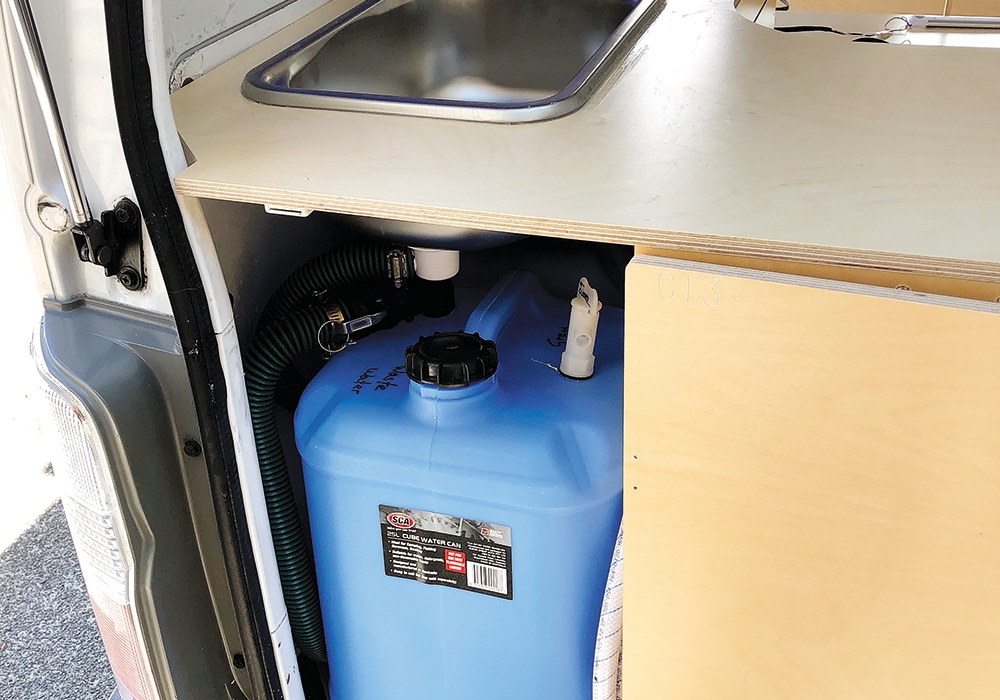
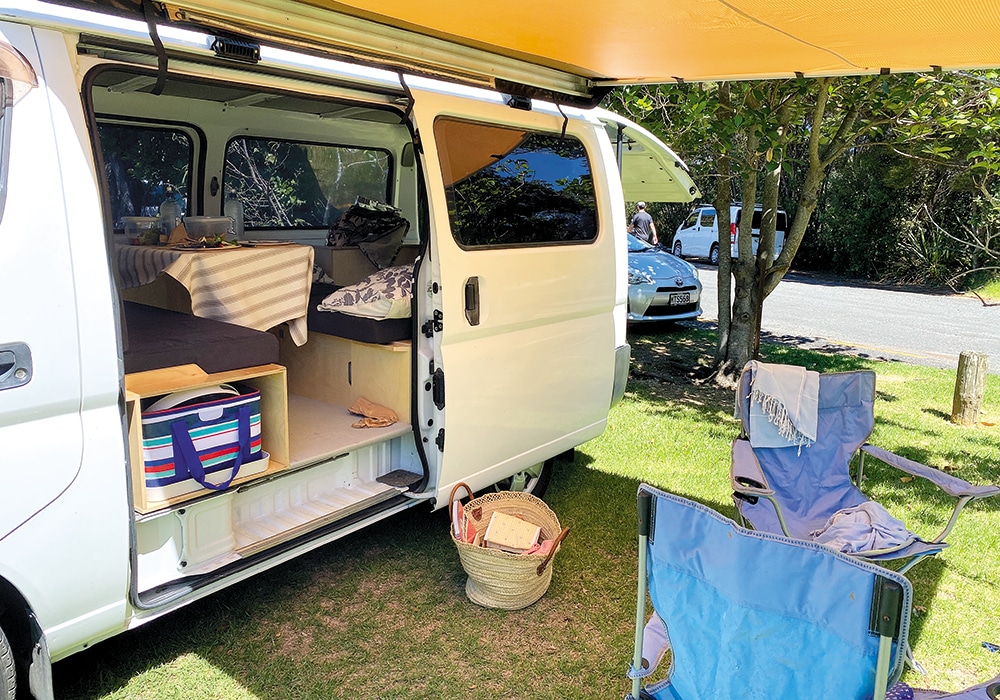
Karen and I absolutely love the result. Karen finds the cooking convenient because everything is at hand. The kitchen is horseshoe-shaped, with a two-burner gas camping stove and a fitted 21L thermoelectric chilly bin. She can cook from inside the van or standing outside, sheltered by the lift-up rear door.
Two 25L water tanks are fitted under the bench – one for fresh water and the other for grey water. Water is pumped from the freshwater tank by way of a benchtop hand-pump, which also ensures you can’t leave the tap turned on!
A portable slide-out toilet is stored under the middle bench seat. The breakdown double bed is comfortable, and easy to set up using the bench seats. There’s plenty of storage. We store our clothing in a holdall which fits into a cubby hole.
We just can’t find the time to get away as much as we would like. When we do, we have such a lot of fun, and the fit-out attracts a lot of attention wherever we go. We don’t take a radio or mobile phones and don’t have a TV, so when we go away, we get a good break.
How did the cost compare?
I’d compared all the options, and I think that doing it the way I did was certainly cost-effective compared to sourcing all the material and doing my own carpentry and cabinet-making (and making my own mistakes). I bought the van for $9000. By the time it was fully kitted out, with the additions and everything ready to go, it cost around $16,000. If I sold it today it would most likely fetch close to what it cost us.
What advice would you give others?
Buy the kit and the van, get hold of me and I’ll do it for you! But joking aside, I don’t think it’s beyond most people’s skills. It‘s really not difficult to do your own build, and it’s very satisfying. But if you don’t want to, the VanLab guys will do the fit-out for you.