
Its distinctive sourness comes from lactic and acetic acids that develop in the dough as it ferments over time. It takes around 5-7 days to ferment the starter, and overnight for the dough to sit, but the result is worth the wait.
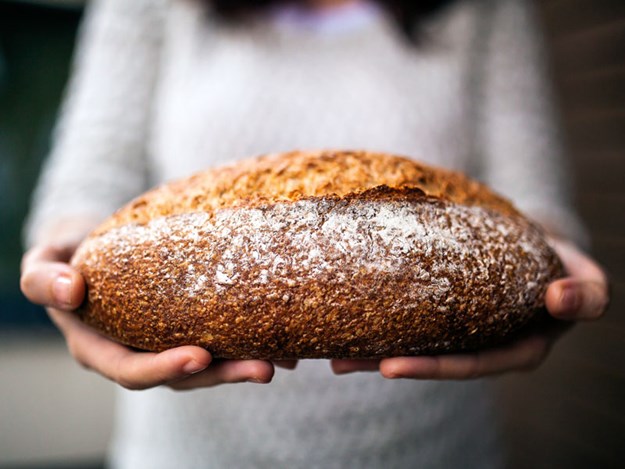
A sourdough starter takes on a life of its own if you feed it and take care of it. Top New Zealand baker Dean Brettschneider apparently takes such good care of his starter he carries it around with him and feeds it religiously.
“They’re all alive so you have to keep them like little kids,” says Ralf Schmidt of the MIT School of Baking & Patisserie.
“You have to feed them on time, and give them time - they say bread waits for no-one so there’s the time, the temperature and the process and everything is timed to when you want it ready.”
His colleague Monique Brik has lovingly tended to her own sourdough starter for a couple of years now, but she uses a method that takes minimal effort on her part, keeping it a fairly dry consistency (known as a ‘stiff’ starter) in the fridge so it only needs feeding every few days, and even freezing it when she goes away overseas so she knows it’s safe in a state of hibernation.
The reason for all this loving care is because once you create a good starter and you understand its properties, you want to keep it so you can go on making great-tasting bread.
“A sourdough is a pre-ferment but it’s one that you’re maintaining and keeping alive,” says Monique. “You’re always feeding it and you’re always using it and you’re growing from it and that’s what turns into a sourdough.”
How does sourdough make bread rise?
Wild yeasts are tiny fungi that exist all around us in varying degrees, in the air, settled on work surfaces, in some of the ingredients you bake with and, most importantly, in flour. Lactobacilli are also all around us and have a wonderfully symbiotic relationship with wild yeast.
Lactobacilli break down flour’s complex carbohydrates into simple sugars, exactly what yeast needs for food. The yeast feeds on these simple sugars, producing carbon dioxide bubbles. The elastic wheat gluten in bread dough traps these carbon dioxide bubbles, causing the dough to expand as if it contained a million tiny balloons.
The by-products are flavourful organic acids. Lactic acid adds a rich, mellow flavour to bread, while (to a lesser degree over a longer period of time) acetic acid gives sourdough bread its sour tang.
By varying the hydration of your starter, the temperature at which it’s fed, and the temperature and duration of a sourdough loaf’s rise, you can make sourdough bread that is richly flavoured with barely a hint of sour, or one that’s truly mouth-puckering.
This starter recipe takes about a week to become strong enough to use for bread baking, but it can vary due to the temperature and humidity of your kitchen and the flours and feeding schedule you use.
How to make a sourdough starter
There are scores of self-proclaimed sourdough experts willing to share with you the secrets to sourdough, but the problem is these ‘secrets’ are often completely contradictory. Scientific bakers hold that sourdough bread can’t be made without a thorough understanding of the symbiotic chemical relationship between yeast and lactobacilli.
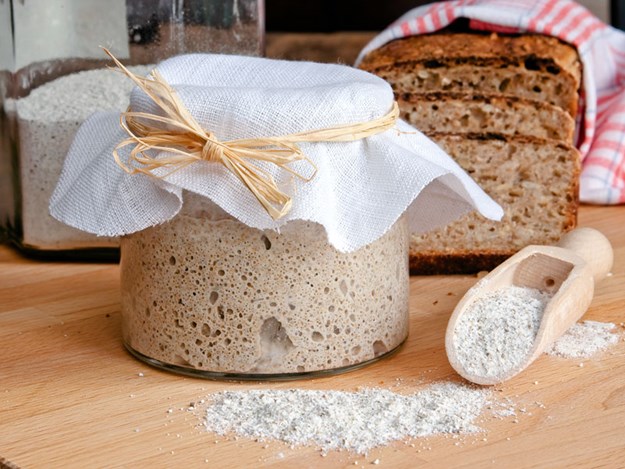
These wild swings between science and superstition make the sourdough sphere more intimidating than it needs to be. Sourdough refers both to the bread and the starter used to make it. A sourdough starter begins with a combination of flour and liquid.
The proportion and type of flour and liquid can vary dramatically, from a stiff starter made entirely with rye flour and water, to a liquid batter of milk and cornmeal, and everything in between.
Friendly bacteria (lactobacilli) present in our natural environment and the wild yeast attracted to and living on flour (particularly wholegrain flour) begin to work with one another when flour is mixed with warm water. These tiny living creatures (collectively called the sourdough’s microflora) generate by-products that cause bread to rise and give it complex, rich flavours.
Notes
There is no yeast added to this starter, although some recipes do begin with added yeast. As a result, it will take longer to get going, but if you follow the instructions you should end up with a very strong, active starter. Make sure your workspace, hands and any containers or utensils you use are clean before you begin, to avoid contamination.
Day 1
A warm place (20-21°C)
113g whole rye flour or whole wheat flour
113g non-chlorinated cooled water
Food-grade plastic container
Mix flour and water in your container and stir together thoroughly - make sure there’s no dry flour anywhere. Cover the container loosely and let the mixture sit at warm room temperature (about 21°C) for 24 hours.
The colder the environment, the more slowly your starter will grow. If the normal temperature in your home is below 20°C, find a warmer spot like on top of your fridge or another appliance that generates ambient heat.
Day 2
113g strong flour
113g non-chlorinated cooled water
You may see no activity at all in the first 24 hours, or you may see a bit of growth or bubbling. Either way, discard half the starter (113g) and add to what’s left 113g of strong flour and 113g of water (cool if your house is warm, lukewarm if it’s cold). Mix well, cover, and let the mixture rest at room temperature for 24 hours.
Day 3
113g strong flour
113g non-chlorinated cooled water
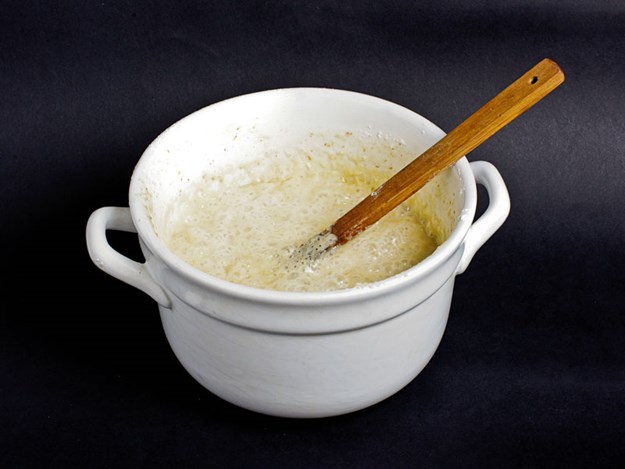
By the third day you’ll likely see some activity: bubbling, a fresh, fruity aroma, and some evidence of expansion. It’s now time to begin two feedings daily, as evenly spaced as your schedule allows (e.g., 8am and 8pm).
For each feeding, stir the starter thoroughly, then weigh out 113g to keep - discard (or give away or use) the rest. Add 113g of flour and 113g of water and mix thoroughly, then cover and leave to rest at room temperature for 12 hours before repeating. You may or may not see a reduction in the activity levels of your starter from this point on - either is normal.
Days 4 & 5
Repeat two-a-day feedings, and then continue for as many days as it takes for your starter to become very active. After about a week of consistent feeding, your starter should be rising after you feed it, there may be little ‘rivulets’ on the surface full of finer bubbles, it will be the consistency of a waffle batter, and it should have a tangy aroma - pleasingly acidic, but not overpowering.
Day 7 (or so)
Once the starter is ready, give it one last feed. Pour off all but 113g and feed as usual, then let it rest at room temperature for 6-8 hours. It should be active, with bubbles breaking the surface.
Remove however much starter you need for your recipe. Keep 113g of starter and feed as above, then place in its permanent home in your fridge in a container with an airtight lid.
Why do you need to discard half the starter?
The starter will be too strong and grow too much. Keeping the starter volume stable helps balance the pH. Keeping the volume down concentrates the yeast/lactobacilli in a smaller amount of space and means it has more food so it’s not fighting with quite so many other little yeast cells while it’s eating and will grow more quickly. There’s nothing wrong with the starter you’re discarding. You can give it to a friend or use it to bake things like sourdough pizza crust, waffles or other breads.
Notes
A wholegrain flour (whole wheat or rye) is used at the beginning because wholegrains contain more nutrients and sourdough-friendly microorganisms than a standard plain or bread flour. Rye really stimulates the wild yeast, plus it contributes to the tangy flavour of sourdough.
Make sure your flour is not rancid. Wholegrain flours go off much more quickly so store it in your fridge or freezer. Discard once it has reached its ‘best before’ date. It’s important to feed your starter with non-chlorinated cool water which we will call ‘water’ from now on.
The key with this starter is to keep the ratio the same with every feeding: 1:1:1 by weight of starter, flour, and water – use scales, not cups or other measures as measuring by volume is far less accurate.
Stiff vs liquid starters
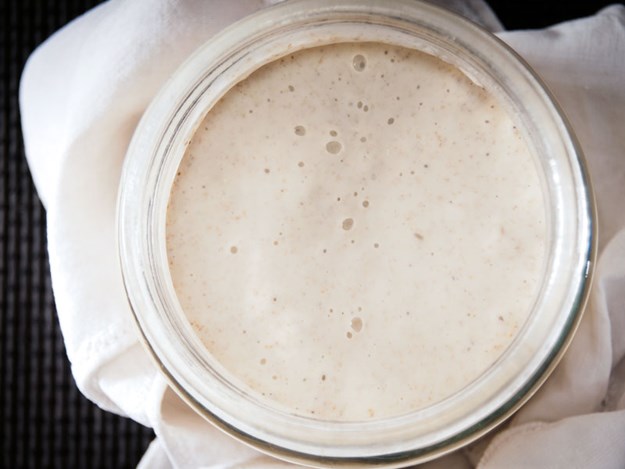
The starter we’re making here is a liquid one, which will be the consistency of batter, but you can also have a ‘stiff’ starter which is more the consistency of a soft dough or even dry and crumbly.
A liquid starter is equal parts flour and water, and is fairly easy to take care of because all you have to remember is the same amounts of flour and water to feed it each time. It will require feeding daily if you keep it on your bench.
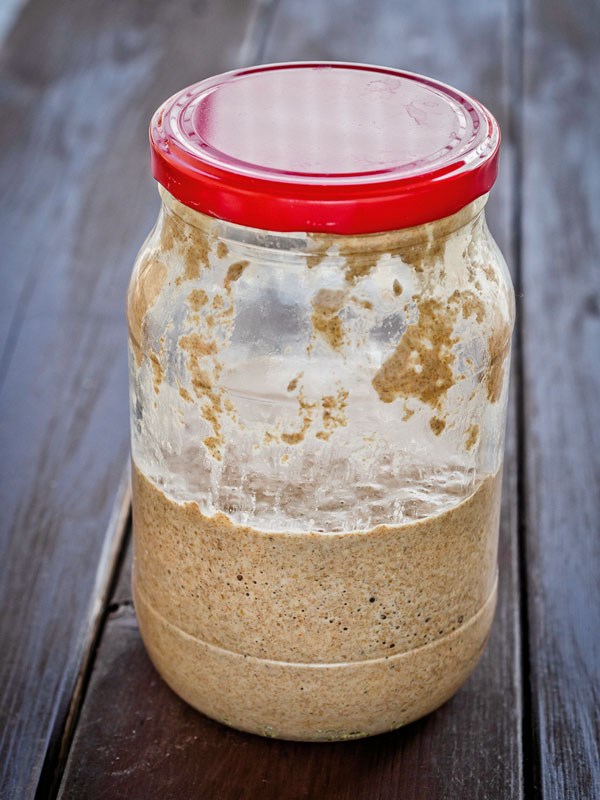
A stiff starter is typically one-third water and two-thirds flour, and is easier to keep if you only bake once a week because it grows more slowly. It is usually fed once a week with the same one-third water, two-thirds flour ratio. The only difference is the flour/water ratio: you can add more flour to convert a liquid starter to stiff, or add more water to convert a stiff one to liquid.
How to maintain your starter
If you do a lot of baking each week: keep at room temperature, feed every 12 hours (each time, discard all but 113g, add 113g flour and 113g water, mix until smooth). If you’re baking the next day, either don’t discard the excess, or add 226g of flour and 226g of water so you get enough starter to work with and some to save.
If you bake once a week or so: store in the fridge. To feed it, tip off or stir in any liquid on top, feed as above and leave at room temperature for at least two hours, then put back in the fridge.
A couple of days before you want to bake, feed the starter but let it rest at room temperature for 12 hours until bubbly, then repeat feedings every 12 hours until you see the starter double or triple in volume in 6-8 hours.
For the final feeding before baking, make sure you add enough flour and water to the starter so you have the right amount for your recipe, plus 113g left over to feed so you can maintain the starter for the next time you bake.
Once the starter is bubbling and vigorous, remove what you need for the recipe and set it aside. Leave the starter you want to keep at room temperature for about 2 hours, then put it back in the fridge.
PJ’s Tips
New research shows most of the wild yeasts that develop in a starter come from the flour, typically not from the air or anything in your environment. If, after a week or so, your starter isn’t ready, don’t lose heart - keep feeding it regularly and it will gain strength.
It may be the conditions in your kitchen are more or less conducive to building a starter, depending on room temperature, the season, humidity, or how much you’ve been baking.
Wholegrain flour is a good choice to create a starter, but it’s recommended you then switch over to feeding it with a strong flour or there’s more of a risk of it going bad, unless you keep it in the fridge long-term.
If your starter is very firm (like a dough), just add more water a tablespoon at a time until you get the right consistency (a thick batter), however you can keep it in this ‘stiff’ state – it will just grow more slowly.
A good sourdough starter smells sour, strong and vinegary. It may fluctuate to a strong alcohol-like smell between feedings (some people liken it to nail polish remover) which is also normal.
If it smells rotten and unpleasant or has a pinkish tinge, it’s best to throw it out and start again. A starter may develop a crust, but this recipe is more likely to have liquid sitting on top – stir it back in before you use or feed it, and keep it covered to prevent this. It may also go a bit ‘gluey’ in consistency, but this is normal.
To increase the amount of starter if you’re doing extra baking, feed just before baking, or feed without discarding for a few feedings. A starter will swell up when fed, then sink back down as the yeast ceases feeding - don’t feed again until it has sunk down or you can over-feed it.
Sometimes the liquid on top of this starter can go dark over time as alcohol is created by the yeast as it dies off. Tip the liquid off or mix it in, then feed your starter if this happens.
A starter may grow and become active but if it’s not working when you come to bake with it, it may be it needs more feeding, but it’s also likely it’s getting too cold. Try storing it in a warmer place (preferably somewhere that is 20-21°C).
3 steps to reviving a starter
If your starter is covered in a clear, dark liquid (alcohol), lacks bubbles or other signs of activity, and has a very sharp aroma, it is possible to bring it back to life.
- Stir the liquid back into the starter.
- Discard all but 113g and leave at room temperature for a while.
- Feed the starter 113g water and 113g flour twice a day - discard all but 113g of starter before each feeding. It should soon become healthy, bubbly, and active.
Warning: if your starter turns ominously pink or red, shows signs of mould growth, or smells decidedly putrid, throw it away.
Monique’s 3 steps to looking after a stiff starter

If your starter is covered in a clear, dark liquid (alcohol), lacks bubbles or other signs of activity, and has a very sharp aroma, it is possible to bring it back to life.
- Remove your starter from the fridge two days before you need it. The first day is to allow for it to come to room temperature.
- The day before baking, feed your starter by adding in more or less equal parts flour and lukewarm water. Knead this together into a fairly soft dough and place in a clean container. Keep at room temperature until the next day.
- After making your bread, feed the starter again (using more or less equal parts flour and lukewarm water) before you put it away for the week. Knead this together and place into a clean container that has an airtight lid. Store in the fridge.
Monique’s sourdough hybrid
Ingredients
- 1kg strong flour*
- 650-670ml lukewarm water
- 260g starter
- 20g honey
- 10g dried yeast
- 18g salt
- 20g olive oil
* you can replace 300g of the flour with 100g rye and 200g of wholemeal or your choice of other flour options
Method
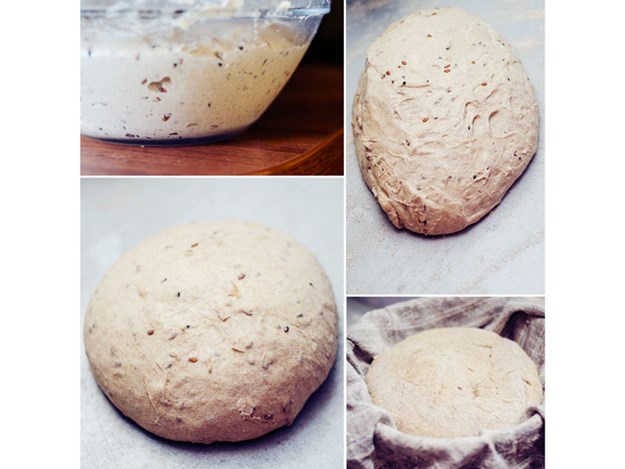
- Mix flour, water, starter, honey and yeast in a bowl, then knead until smooth and silky. This will take about 6 minutes in a mixing machine with a dough hook, or around 10 minutes by hand. If you’re doing it by hand, it will be a good workout and you should be feeling it in your arms and shoulders by the time you finish.
- Add the salt and oil and knead into the dough. Continue to knead until the dough is smooth again. Leave the dough in a bowl covered with plastic wrap and let it rest for 20 minutes.
- Tip dough onto a floured bench and divide into four equal pieces. Shape with your hands until it is round and smooth and feels firm. If you get this right, the bottom of the dough (sitting on the bench) will form a little rosebud in the middle from where it has turned.
- Rest dough for another 15 minutes, then use your hands to shape it into the loaf shape you want.
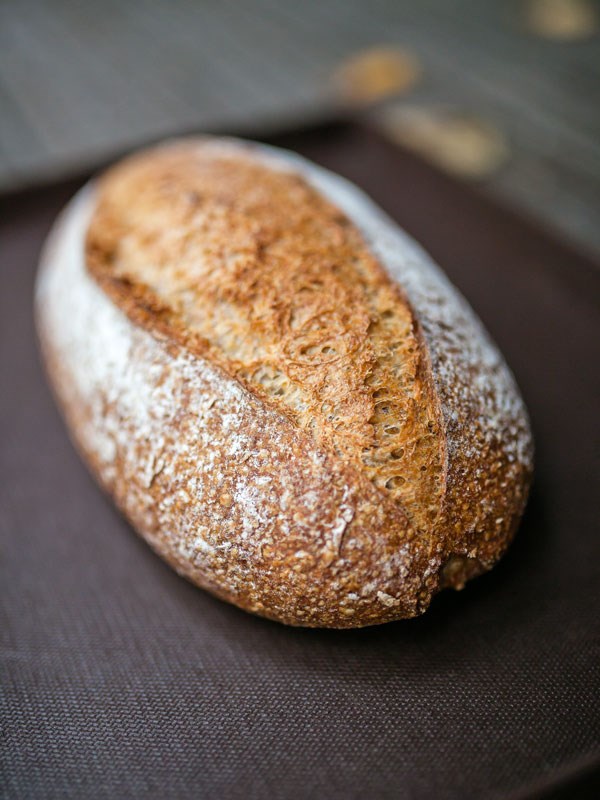
- Pre-heat the oven on 220°C. At this point you can lightly mist the tops of your loaves with water and dip them into seeds if you wish, and/or use a sharp knife to cut a pattern onto the bread. Make sure the cuts are at a 45-degree angle to the top of the dough, not straight up and down. Flour the bread before cutting if you wish.
- Place two loaves each onto baking paper-lined trays, leaving plenty of room between them and the outsides of the tray. Place a cardboard box over the trays and leave the loaves to rise until nearly double in size. It can take up to an hour.
- Mist the first two loaves and the walls of the oven well before placing the tray in the oven, just below the centre rack position. Bake for around 20 minutes. Spray the oven again to bake the last two loaves.
How to shape bread
For some great, easy-to-follow video tutorials of how to shape bread, check out
these sites online:
youtube.com/user/Rylandpeterssmall
youtube.com/user/KingArthurFlour
thekitchn.com – search for ‘how to shape a loaf of bread’
Want a mouth-puckeringly sour sourdough?
Often the sourness of the bread isn’t contingent on the sourness of the starter but more on how you handle the dough. Dough that’s chilled will allow the yeast to give off more acetic acid, which is more sour (think vinegar). If all else fails you can try adding 1/8 to 1/4 teaspoon of citric acid to the dough to totally ramp up the sour flavor. PJ Hamel


