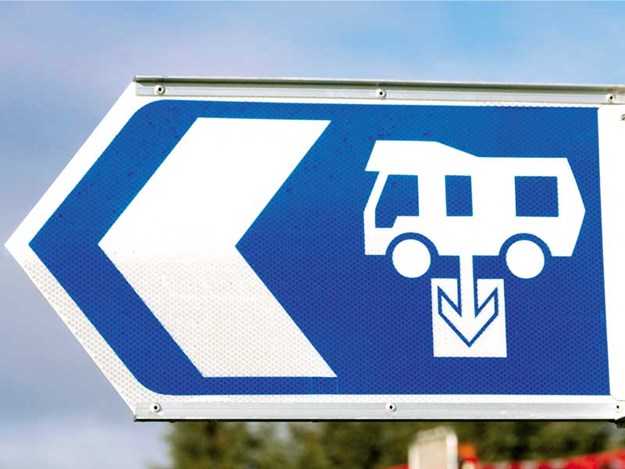
Today in New Zealand signs indicating the location of public ‘Dump Stations’ are a common sight. It hasn’t always been that way.
The New Zealand Motor Caravan Association (NZMCA) got the ball rolling. Thirty years or so ago they recognised there weren’t enough places across New Zealand for their members to dispose of their ‘waste waters’ satisfactorily and decided to do something about it.
Kea Campers came on board and together they initiated a scheme to persuade and financially assist councils and local businesses to install public dump stations. The scheme is still in place, ensuring dump station numbers increase as RV ownership increases.
Private dump stations, usually found in holiday parks, are for the use of their guests. Some parks make these facilities available to non-guests for a small fee.
What is a dump station?
Dump stations are pretty uniform in the way they are set up. Basically, each station consists of a slab of concrete around half a metre by half a metre surrounded by a low nib wall.
Usually there are two drain points in the slab. One is a capped pipe for motorhomes with large tanks and a large 75mm discharge hose that attaches to the standpipe with a twist-on coupling.
The other is a 100mm+ drainpipe covered with a grate into which the contents of the toilet cassette and the grey water tank are dumped.
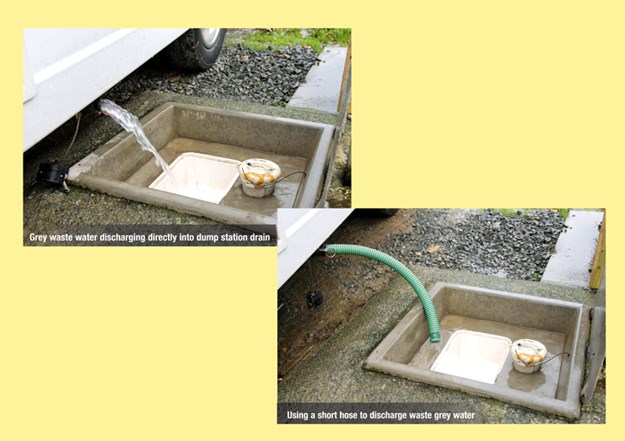
Positioning the RV beside the dump point
Positioning the waste outlet on your RV close to the dump station drain may allow the grey water to discharge directly from the vehicle into the drain. Having a short metre-long grey water hose can help to simplify the positioning task.
Emptying the grey and/or black water tank
- Connect the grey water hose to the grey water tank outlet, place the other end into the drain, then open the release valve and drain the tank.
- Once the tank is empty, disconnect the hose, empty it, then flush it with fresh water before stowing it away.
- Note. If you have a black tank you will probably have a 75mm hose with twist-on couplings that fit the dump point standpipe mentioned above.
- It is a good idea to empty the black water tank first, then empty the grey water tank with the same hose. Finish by rinsing the hose with fresh water before stowing it away.
Emptying the toilet cassette
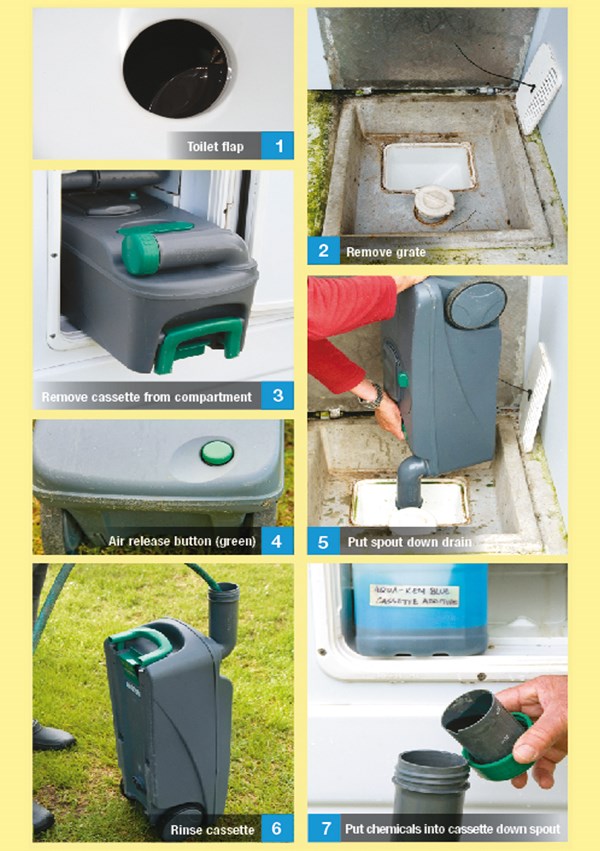
- Before you start; read the toilet cassette handbook so you know the function of all the knobs and levers on the cassette. Put on disposable gloves if you have them.
- Lift out the drain grate so the waste from the cassette doesn’t block it. If you are lucky there will be a cable tie attached to the grate, making it easier to remove.
- Take the cassette out of its locker, remove the cassette spout cap and put it safely away from the drain.
- Avoid having the contents surge out and splash you by putting the cassette spout down the drain before you press the cassette air release button.
- Once emptied, rinse out the cassette using water from the usually adjacent tap. Empty the rinse water down the drain. Do not refill your fresh water tank from this tap.
- Place the toilet chemicals in the cassette with a litre or so of water, then put the cassette spout cap back on.
- Refit the grate in the drain and rinse the outside of your cassette.
- Leave the dump station better than you found it by washing it down before closing the lid.
Note. If there is room, it is handy to keep a smaller container of toilet chemicals in the locker with the cassette.